Posted in VBLOG on December 25, 2021 by asteriondaedalus
So, yes we now have a video build log, or VBLOG!
Ta dah!
Well, we really already did, BUT rather than dry vids (though they’ll still be kept in a separate playlist), there’ll also be flashier content.
Sure we have BLOGS and VLOGS, but noting the B in BLOG has a mysterious history and meaning, there are likely fewer “rules” than people think for what we can call a channel.
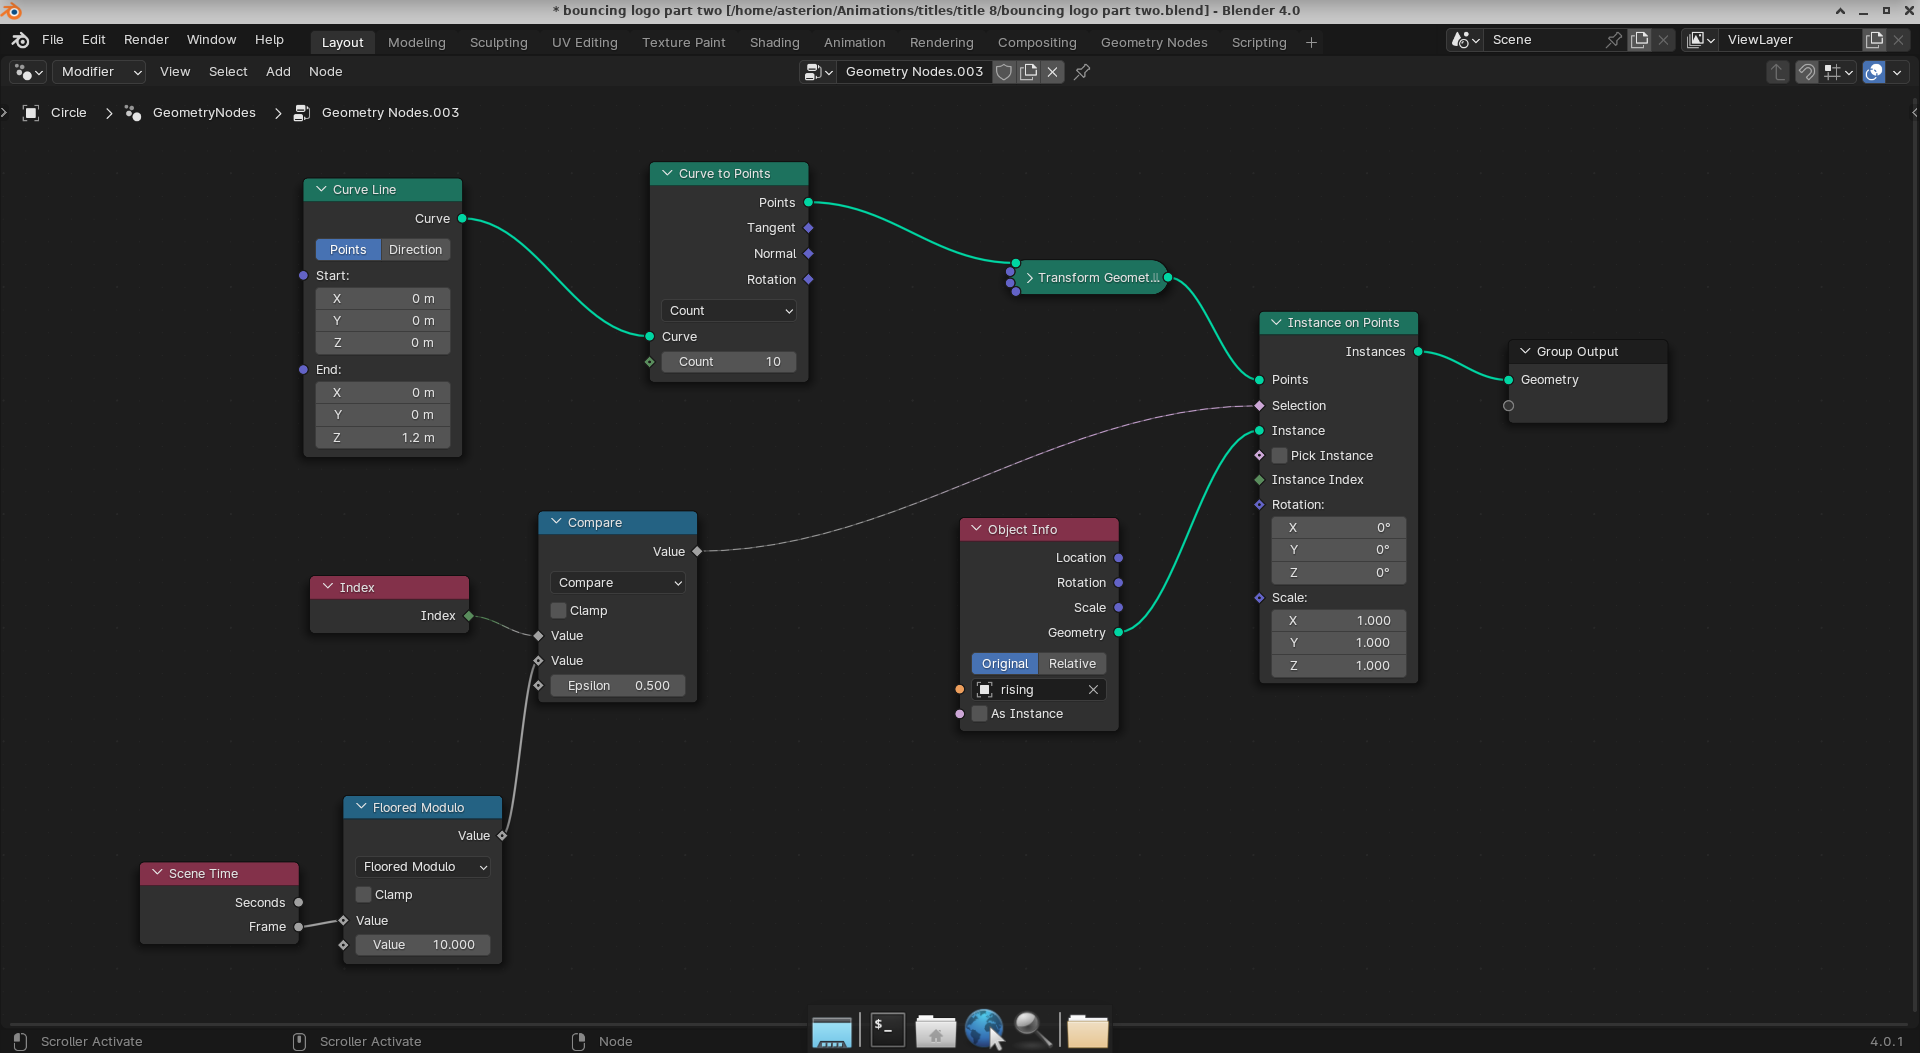
Just playing with geometry nodes to animate the tail of my video intro, since I have been opting to add new intros. Need to keep the branding though. Hence the bouncing logo. Still needs scaling and the text added, but not bad.
I decided not to try to do one big complex node model for the entire animation. So I made a second file and the following nodes lifted the logo from whence it landed, ready for the text to appear.
I then started a new file with the stationary logo and added the appearing text. To finally compose the outputs from the three files thus.
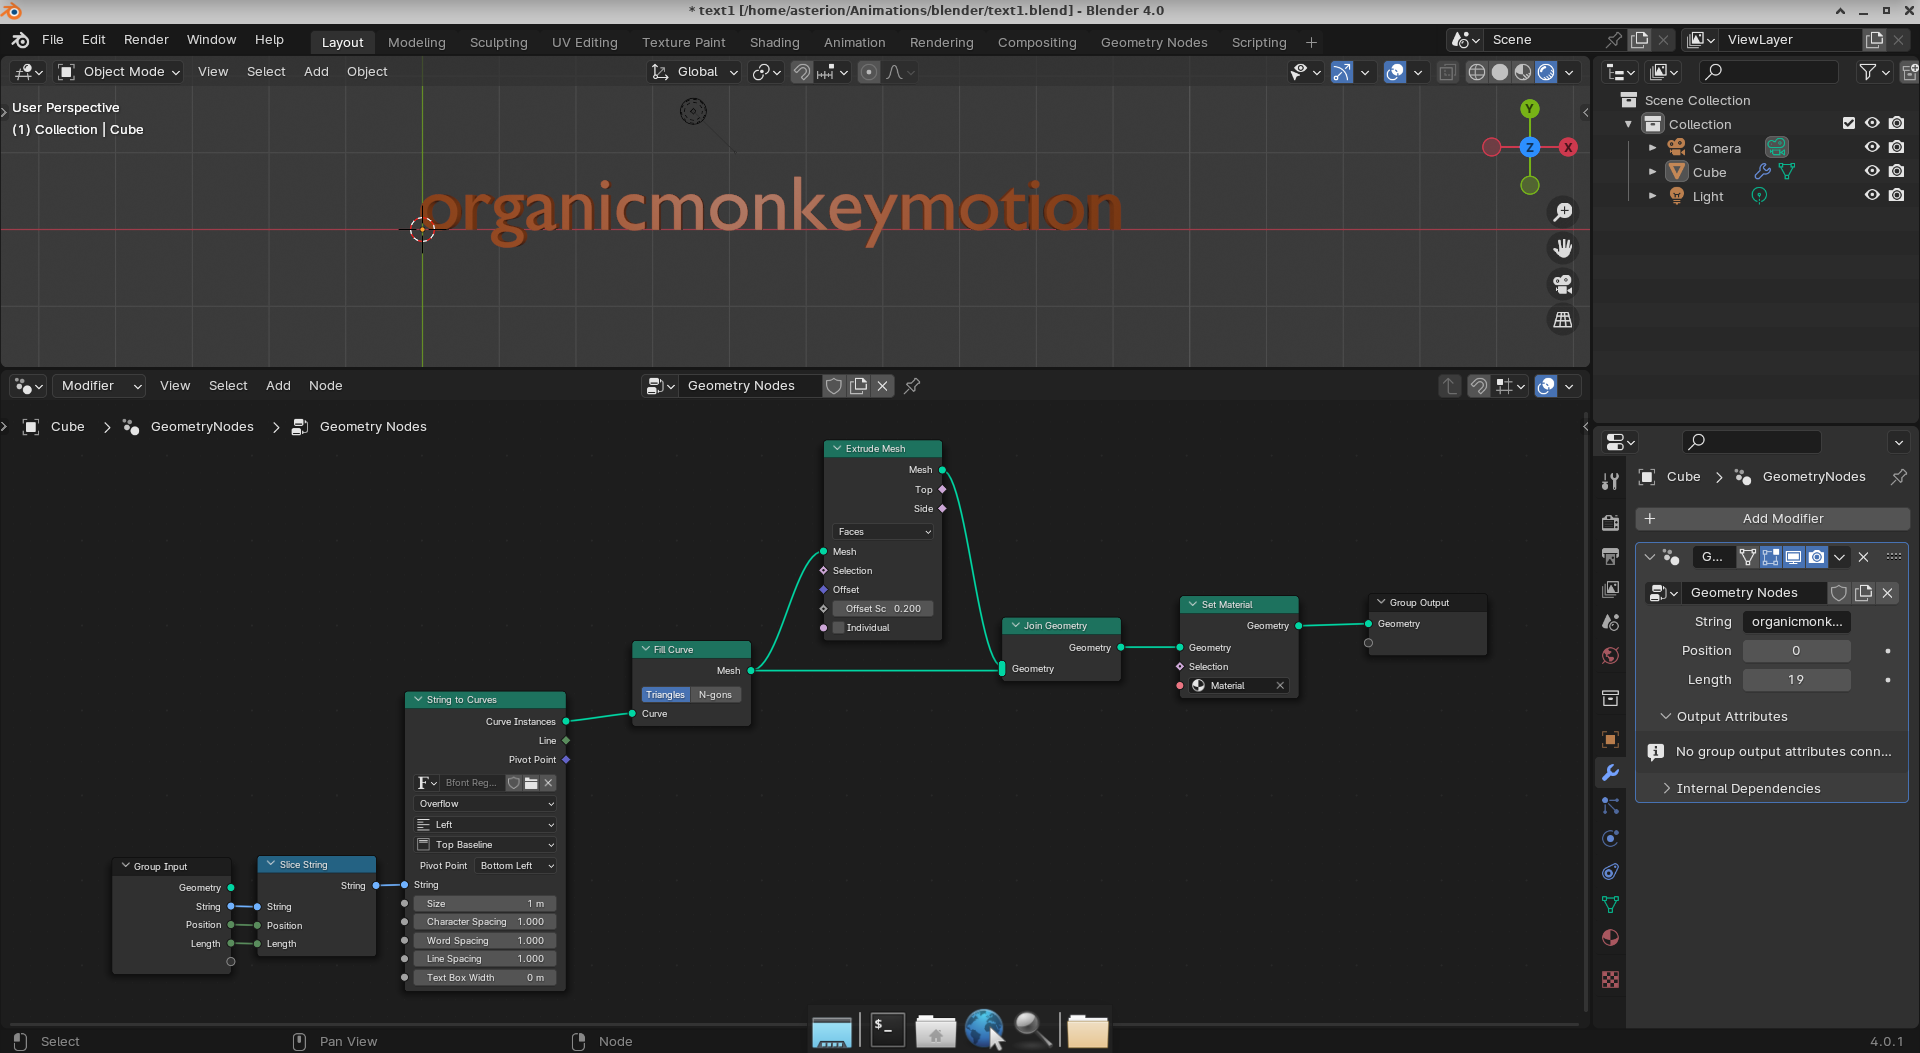
Yeah, so the problem with the tutorial below is that the mesh islands means lower case elements like “i” and “k”, and probably “j”, are treated like two meshes so when animating by island index the characters have two animate parts. Meaning “abc” is 3 “islands”, whereas “ijk” is 6 “islands”. There is some reference in the comments to “instance indices” to “delete” characters, that avoids use of “islands”, but there is no reference to a specific geometry node nor how it would be weaved through the nodes to get the effect. The effect is essentially the text appears one character at a time.
I fiddled with this and I simply added a “Slice String” node and the string, its length and position are parameters. So, playing with the length parameter gives you same effect as the more complicated approach in the tutorial. However, you do not have the problem caused by using “islands” since you retain the per (whole) character control. That is both “abc” and “ijk” are 3 characters. Additionally, you get a separate animation effect using the “Slice String” length.
The simplified geometry node model.In fact, you seem to be able to get away with this simple setup.
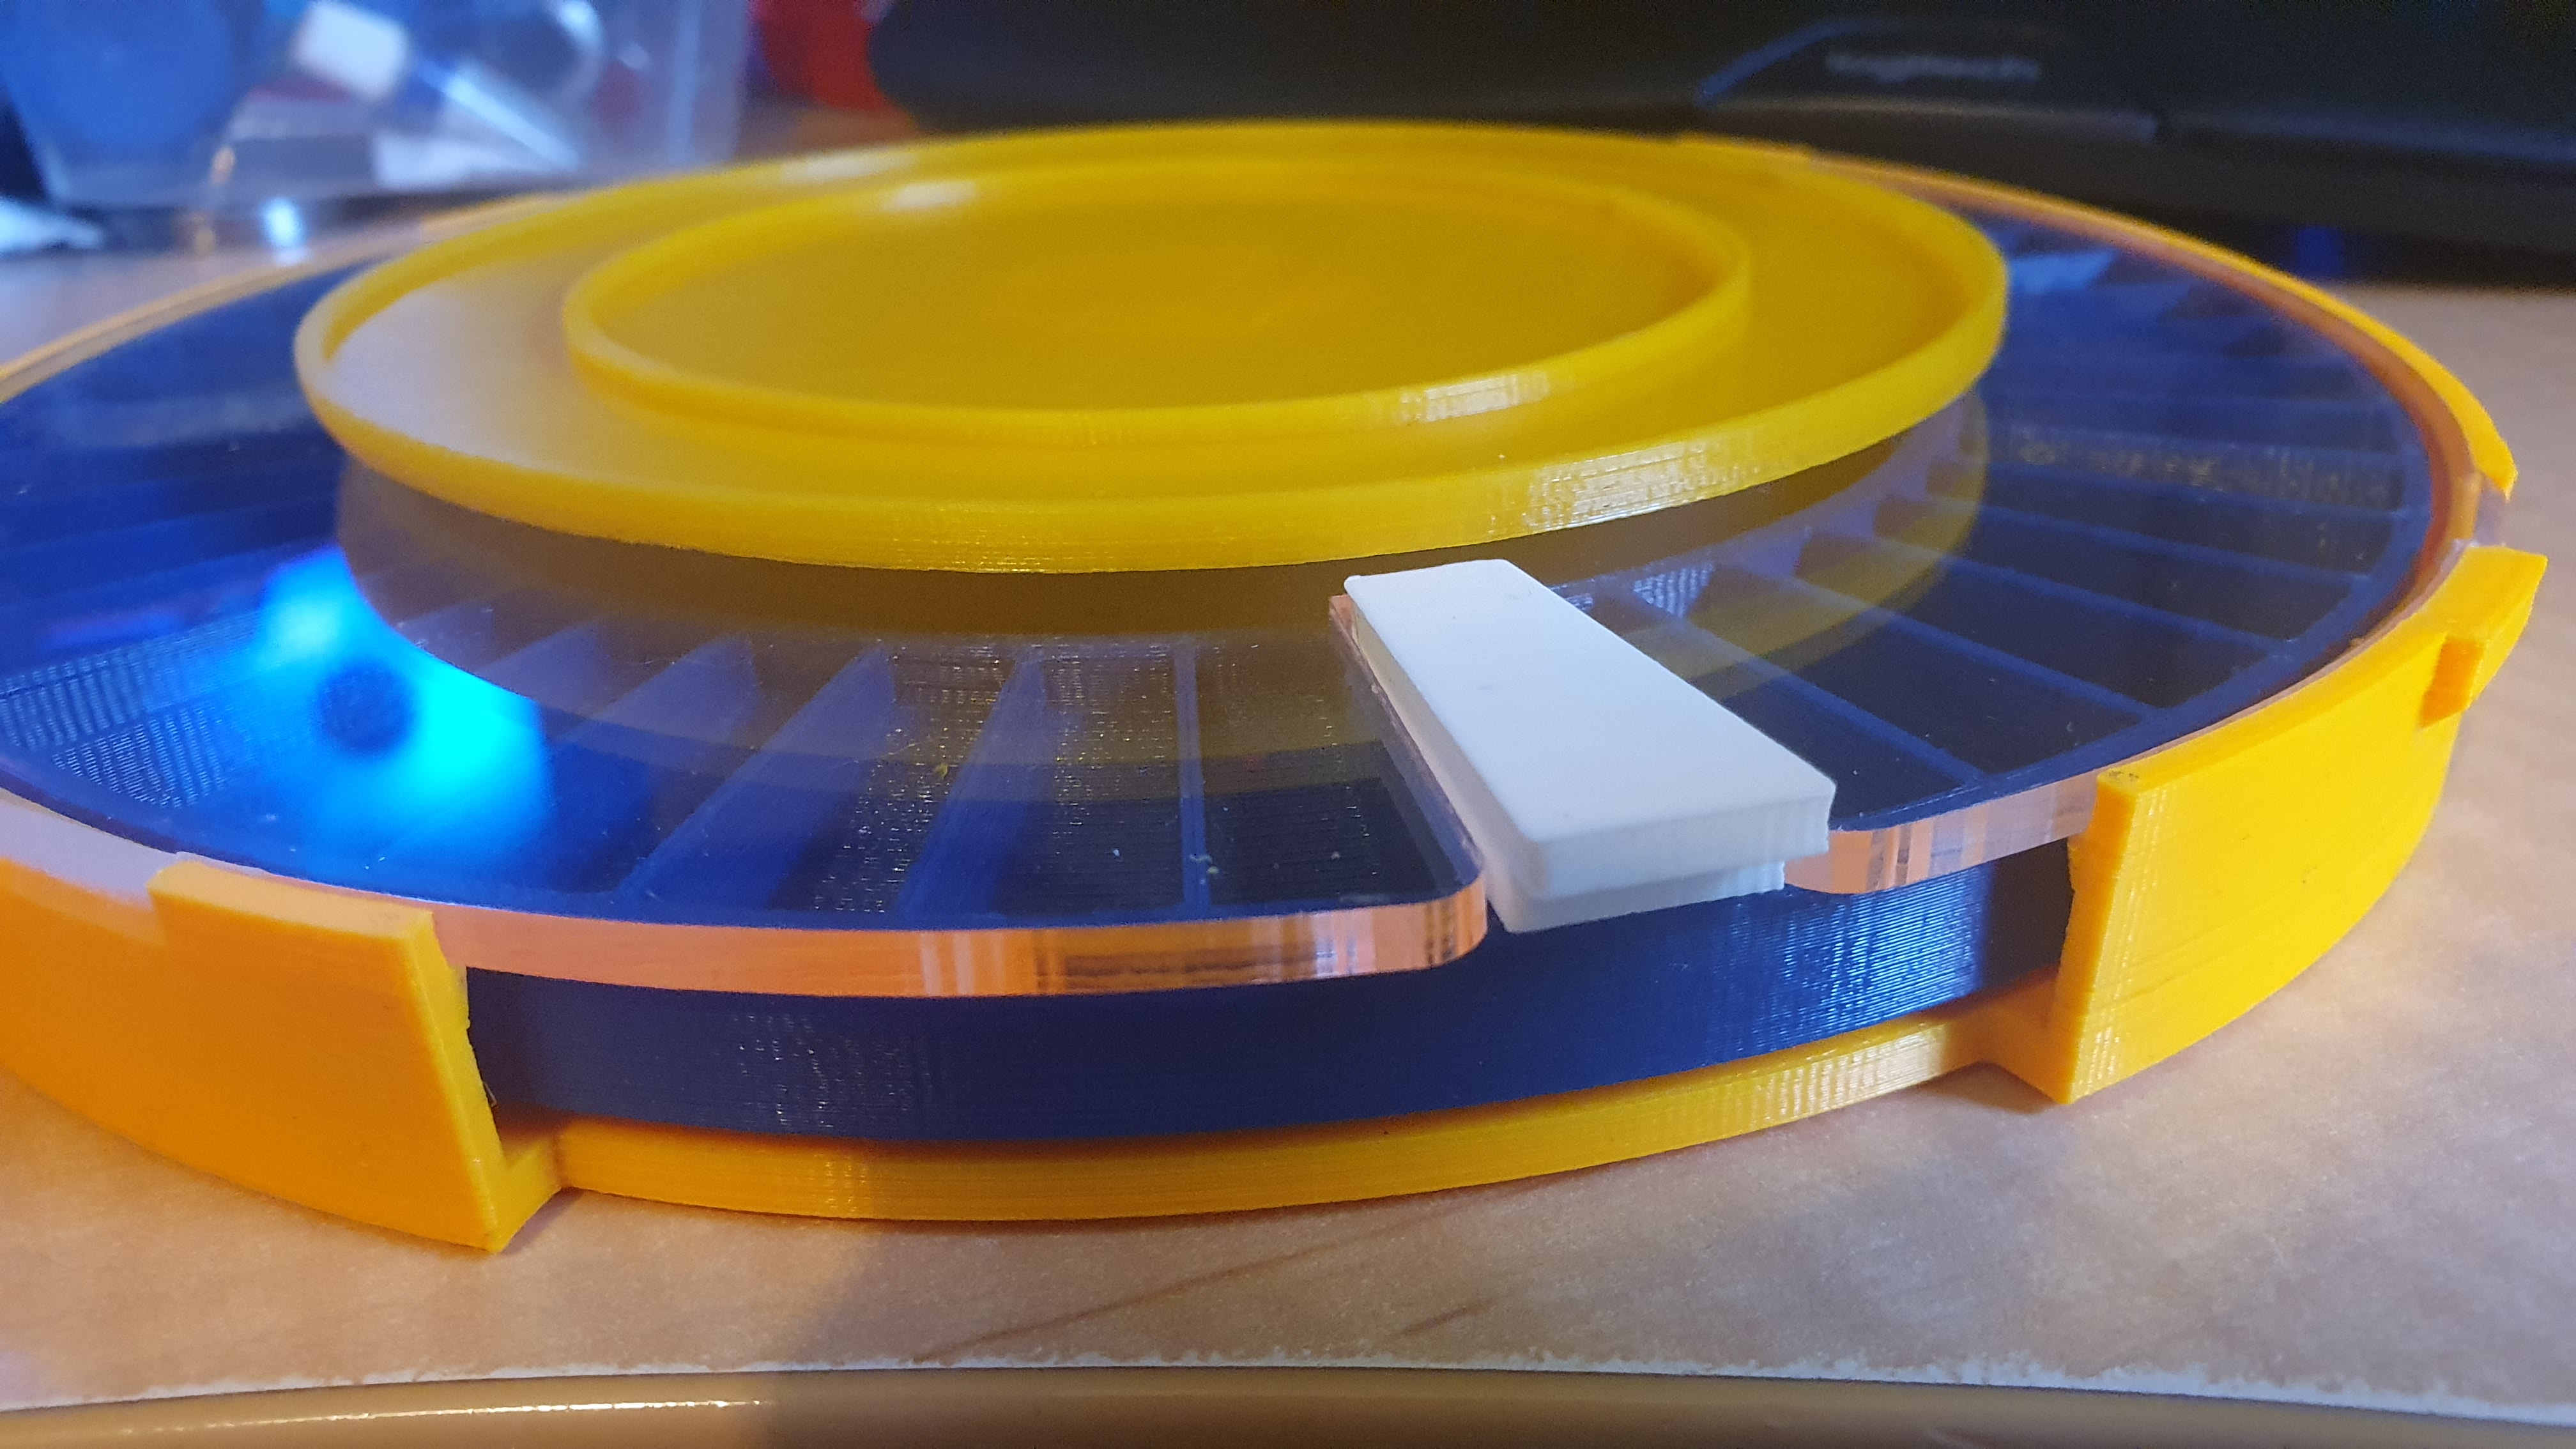
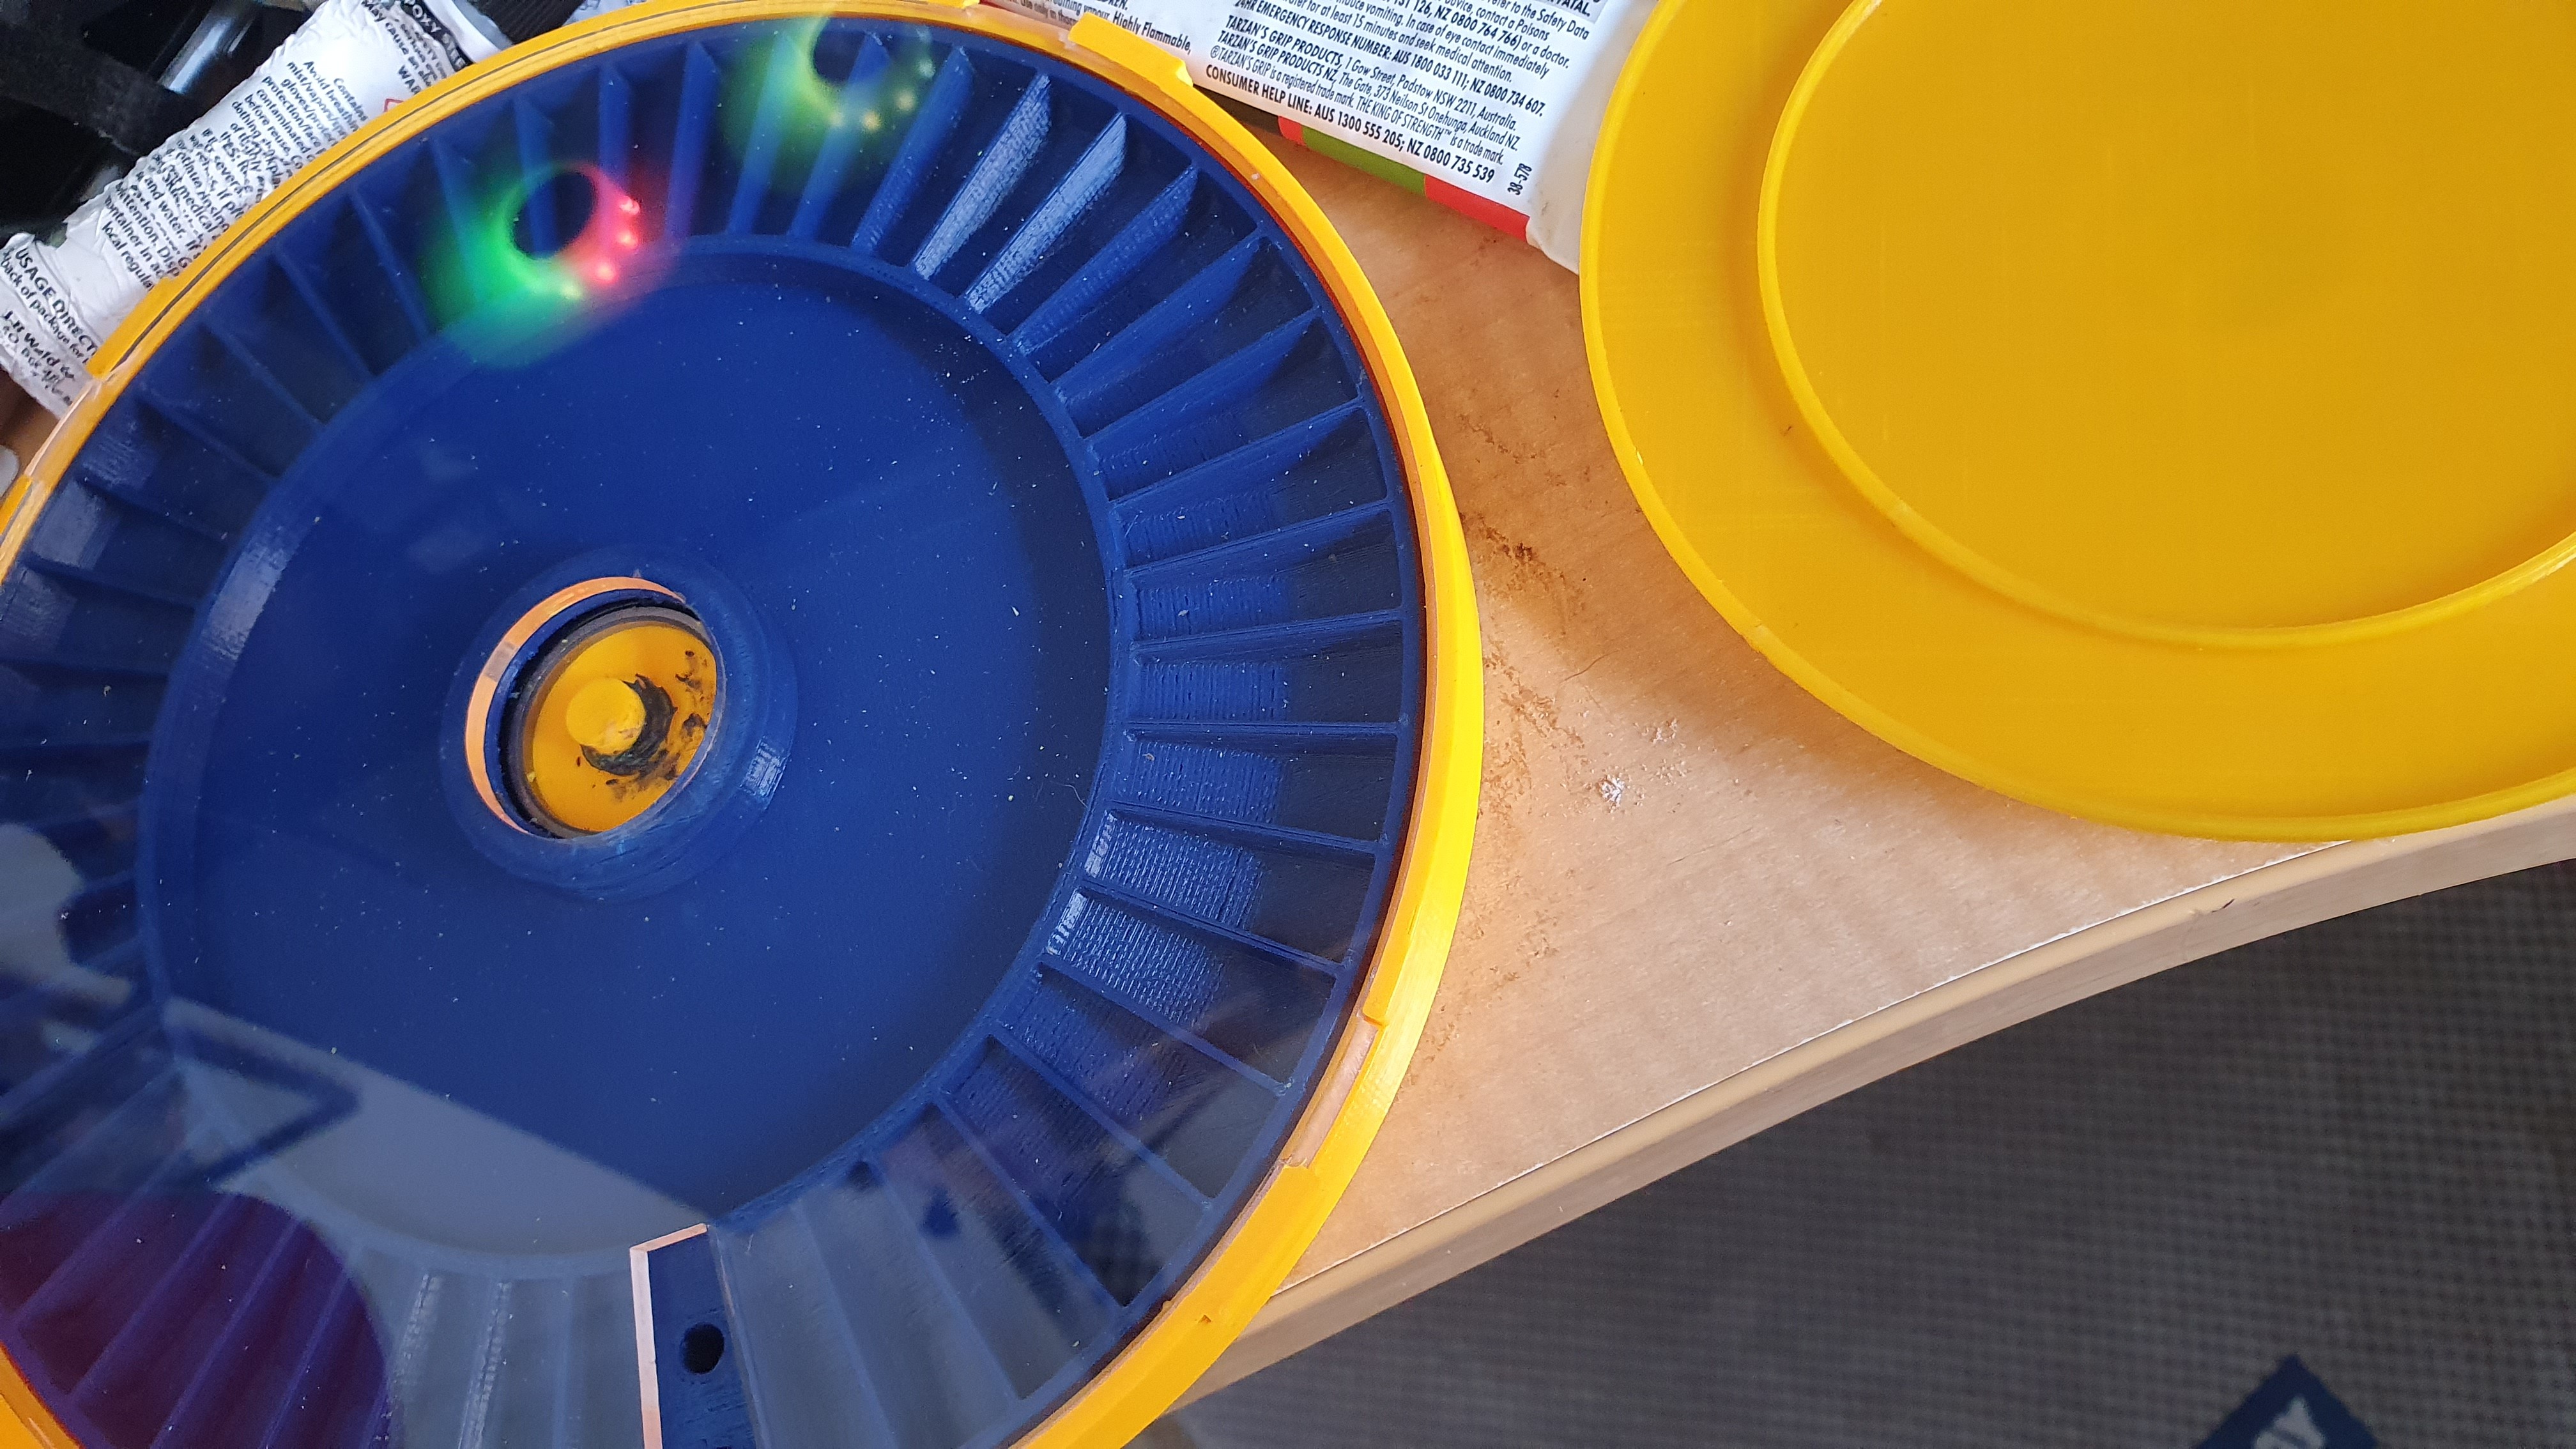
Last step is the rubber mat in the middle. I will need buy a sheet of sticky backed rubber sheet from Bunnings. The approach by the original author was to 3D print a cutting guide and then use a knife to cut the rubber. Why, who knows, as if you have a laser cut perspex lid you can laser cut a thin rubber sheet. So, just now waiting on makerspace to reopen after Christmas and I’ll laser cut the rubber mat.
Now isn’t physics wonderful. The apparent difference in colour between the base and the assembly tray is the blue turning the assembly tray a slight green, since the tray is thin. Yes, that actually bugs me. My fault, I was trying to break out of me habit of black and red for everything.
Oh yeah! Forgot, I had already printed the locky thingy for when storing the loaded tray. I’m sure the “funnel” I printed will turn up, … , eventually.
So, as a design idea kool. However, after filing down the tabs, to allow them to slot into the “catches”, it turned out too fiddly with too fine a detail to succeed I think. Needs a higher precision manufacturing technique.
In fact, the clear plastic lid clips in place anyway, since the 3D printed base walls appear to be slightly too small an inner diameter for the lid. Thus, the walls need be sprung outwards to get the lid to sit in its place. So, the whole thing holds together under sprung tension. You can actually turn the thing upside down and shake it, and the lid refuses to drop out. No need even to glue or tape the lid on.
The black goop, on the centre post, is J-B Weld. I had no superglue left, and it turned out the Tarzan Grip just wanted to melt the ABS.
Nice touch in the photo, the reflection of my ARGB fans in my MonstaPC.
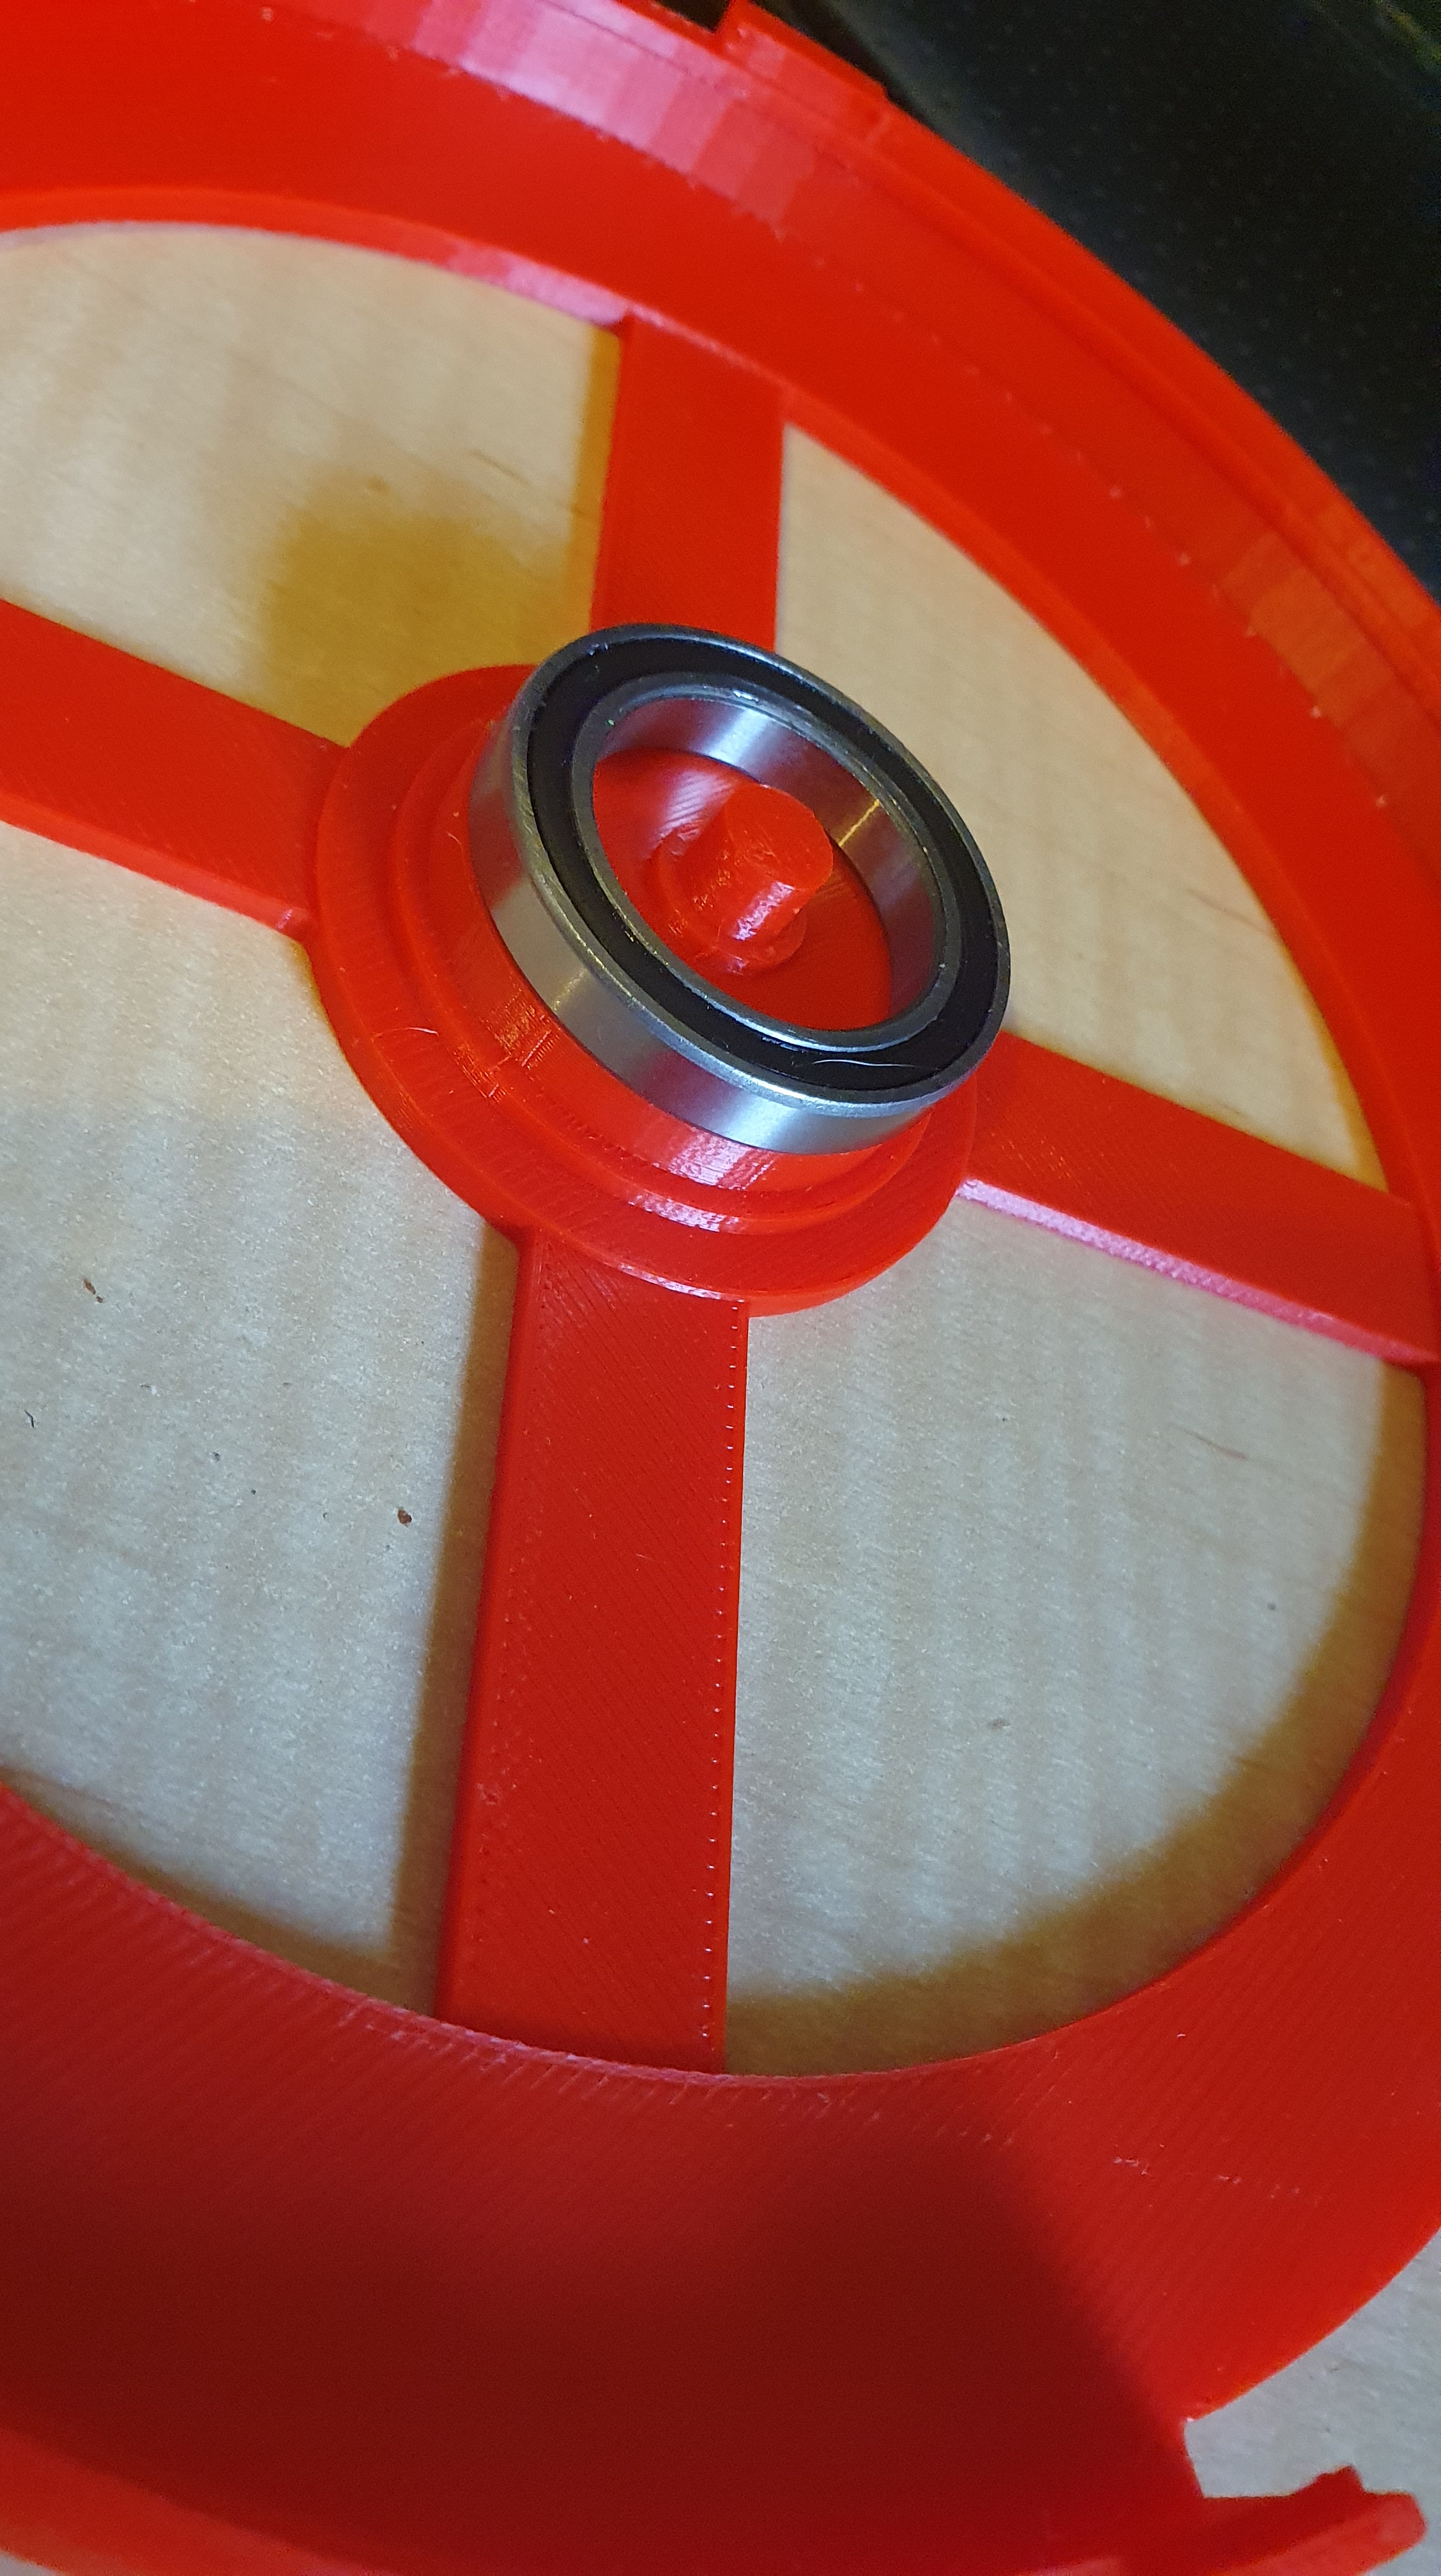
A hack of the design by Unexpected Maker to fix a problem desribed in his video. Call mine above V4!
The post in the middle did not break off per se, there are fiddly aspects with tuning the settings for a Zortrax M300 and yelllow ABS it seems. The original attempt seemed to have a real problem with layer bonding, so I speed up the lava flow and slowed down the print speed. Mostly the print is beautiful, save for the dopey post. Some superglue will fix that.
Details of initial rough draft in issue at github.
This rotating pnp assembly tray being to go with my Hakko 394 vacuum pickup.
So here is the pesky problem I had to fix. The post for the bearing had been set to the outer but not the inner diameter of the bearing. Apparently this is only a problem in the OpenSCAD code somehow, since all the associated STL the author provides do not have the problem. There is a pull request, 2 odd years old, with a “fix” but I had “fixed” manually locally.
Also noting my fix need two variable name changes, so I cannot vouch for the change suggested in the pull request, which only changed one variable name. My code is up at Thingiverse (see “Turntable.scad“).
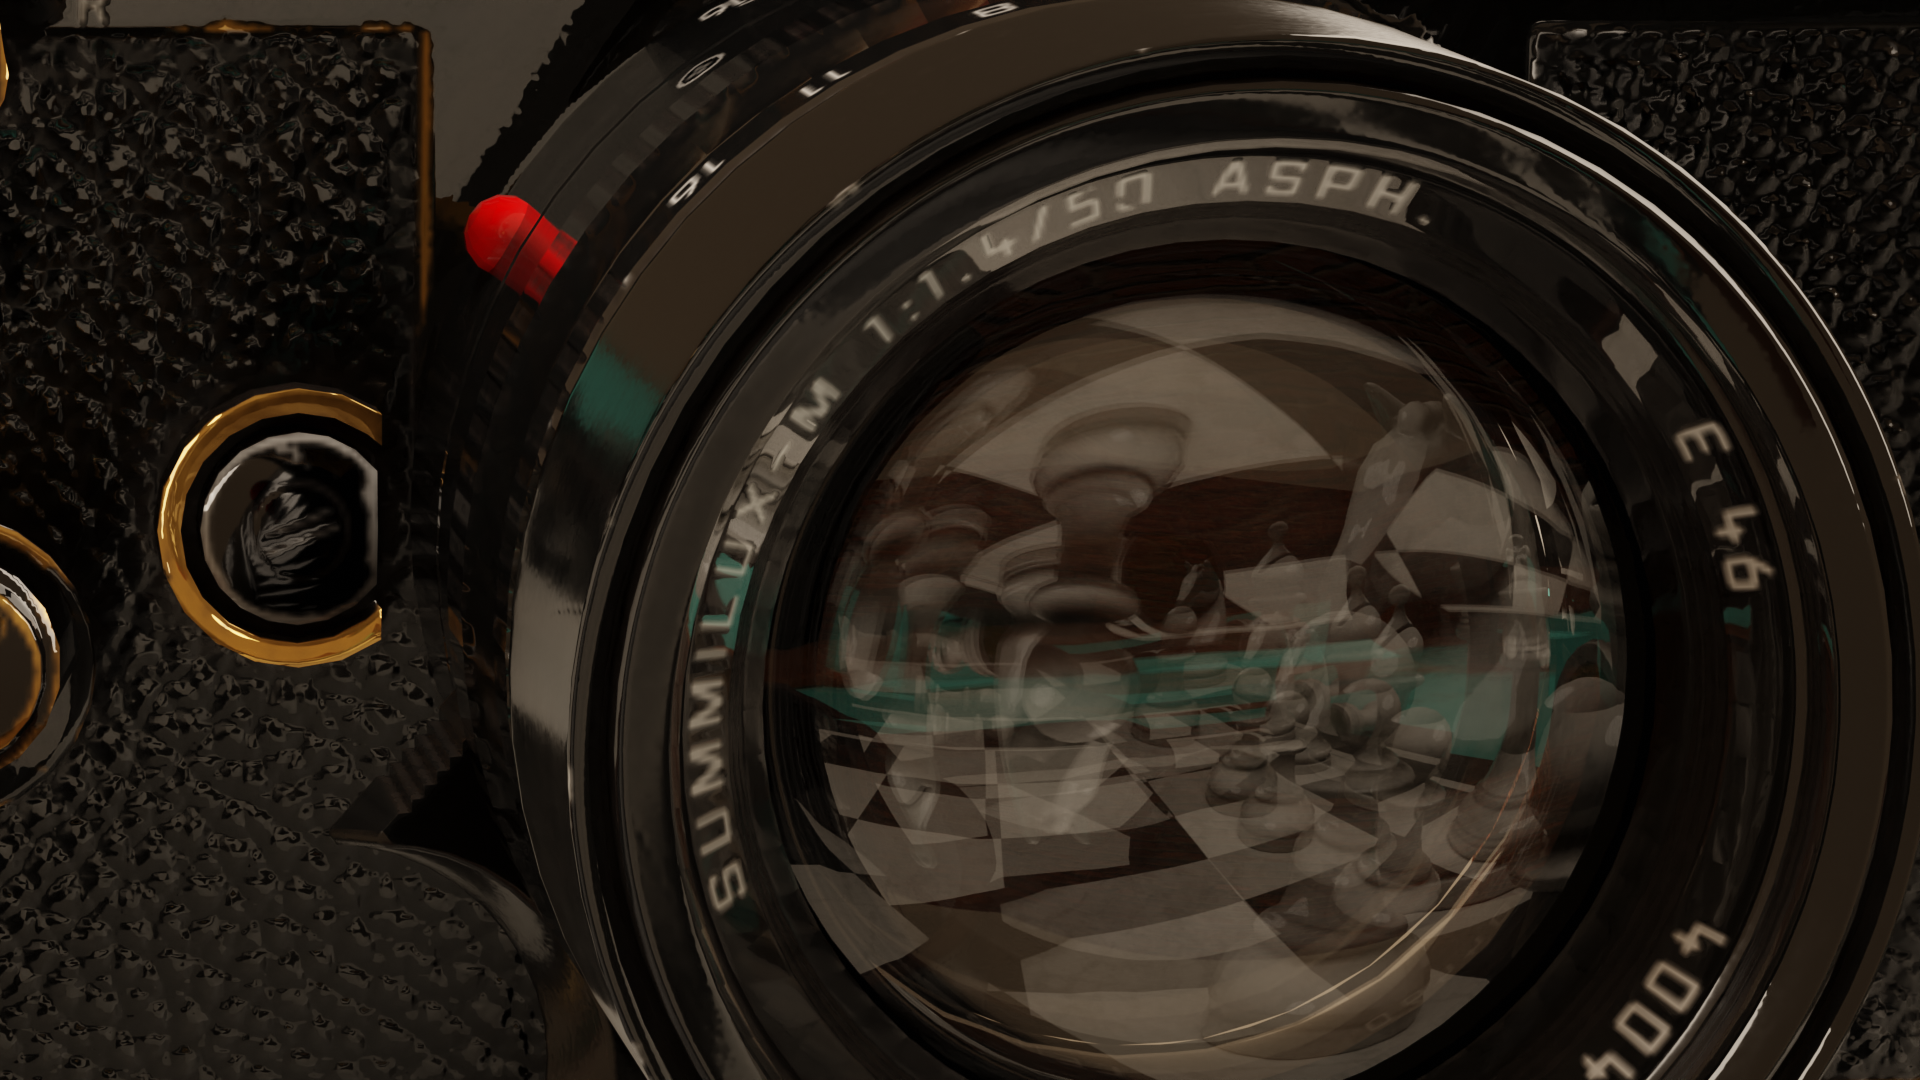
The rug is an image of a rug with a particle system attached based upon ideas from this tutorial, although you could go here also. I want to investigate adding some wear and tear at some point.
I deliberately dishevelled the chess pieces with the camera, or at least arrange the pieces as if the camera had been placed on the board, so as to dishevel the pieces.
I used the mirror twice. I had to change the shader that came with, so as to actually turn it into a mirror. I used the mirrors and the wonky hanging, or setting on the floor, to draw in the second sofa and wooden chair – both mostly or completely out of shot otherwise.
The encyclopedia were separate books, so I juggled them to make them somewhat unkempt.
I also changed the material for the camera lense, such that in close up shots it does reflect etc, but is otherwise translucent to give a hint of being a “lens”.
Paintings are hung slightly crooked. While that grates me in real life, tips abound on the idea that life is not perfectly arranged. So the mat, the coffee table and the black sofa are skewed somewhat.
The trick I found, with the wall paper, was actually to “lay” it with 1m wide strips. That way you can leave gaps, or misalignments. Subtle but there. I even tried using the bump/displacement from the brick wall, to try to give the impression the wallpaper had been glued over the brick wall. Initial experiments didn’t work, but I will look further into that. I am looking also at working out how to damage the wallpaper. It might even be fun to have a weathered paint peeling off the wallpaper etc.
The piece de resistance is the floor, which I based upon a tutorial here, by Default Cube. I still want to “stress” the wood and add dust. Which reminds me, it might also be interesting to have dust in the “volume”.
I will eventually have to look into more sophistated lighting tutorials. The scene is currently bathed only in a 40W area light, with a softened yellow tinge.
Oh yeah, almost forgot. I ditched the material supplied with the glass tube on the vintage oil lamp. I just replaced it with a glass shader.
Now, I was using 4K assets and seemed to get away with that, up until I added the second painting (really being the last item). The GPU choked and blender spat out an out of GPU memory. I backed all the assests back out to 1K assets (really just by painstackenly changing the exr/png references) and then it came good again. Lesson learnt in any event, I don’t seem to need more than 1K assets, or more than 16G, for the moment.


You must be logged in to post a comment.